How to Use Dog Nail Clippers Correctly and Safely (First-Timer's Guide)
A calm, first-timer's guide to using dog nail clippers correctly, covering the three clipper styles, how to grip and position your dog, the right angle, safety guards, and cutting black nails without hitting the quick.
Petful is reader supported. As an affiliate of platforms like Amazon and Chewy, we may earn a commission when you buy through links on this page. There is no extra cost to you.
Learning how to use dog nail clippers well is mostly about three things: holding the tool the right way, seeing where to cut, and taking a little off at a time. Nearly every "I nicked my dog and now she hates it" story comes down to a rushed cut with an unfamiliar clipper, not a bad dog and not a bad clipper. Get the mechanics right and the whole job turns calm and boring, which is exactly what you want.
This is a hands-on technique guide, not a tool review. We will walk through the three clipper styles and how each one actually cuts, how to hold both the clippers and your dog, the correct angle, how much nail to remove, when a safety guard helps and when it gets in the way, and how to handle black nails where you cannot see the quick. If you are still deciding which clipper to buy, see our guide to the best dog nail clippers, and for the complete vet-backed trimming routine (frequency, desensitizing, what to do if you cut too far), read our full walkthrough on how to trim your dog's nails.
- 1The tool matters less than the technique: grip firmly, cut small, and stop before the quick
- 2Scissor/plier clippers suit most dogs, guillotine clippers suit small-to-medium dogs, and a safety guard limits depth for nervous first-timers
- 3Cut at a 45-degree angle, taking off only the tip (about 1-2 mm at a time) rather than one big cut
- 4On black nails you cannot see the quick, so shave thin slices and stop the moment you see a gray or pink oval in the center
- 5Keep styptic powder within reach every single time, before you make the first cut

Sign up for expert-backed reviews and safety alerts all in one place.
The 3 dog nail clipper styles and how each one works
Before you can use dog nail clippers correctly, you need to know which kind is in your hand, because they cut differently and are held differently. There are three common styles, and each has a job it does best.
Scissor and plier style clippers
Scissor-style clippers (sometimes called plier-style) look and squeeze like a small pair of pruning shears. Two curved blades meet around the nail and slice through it when you press the handles together. This is the workhorse style for most dogs, and it is the one we recommend to first-timers with medium and large breeds. The leverage is excellent, so you can cut a thick nail cleanly without crushing it, and you always keep the nail in full view because nothing surrounds it.
- Best for: medium, large, and thick-nailed dogs
- Strength: strong leverage, clean cut, full visibility of the nail
- Watch out for: it is easy to advance too far in one squeeze, so line the blades up before you commit
Guillotine style clippers
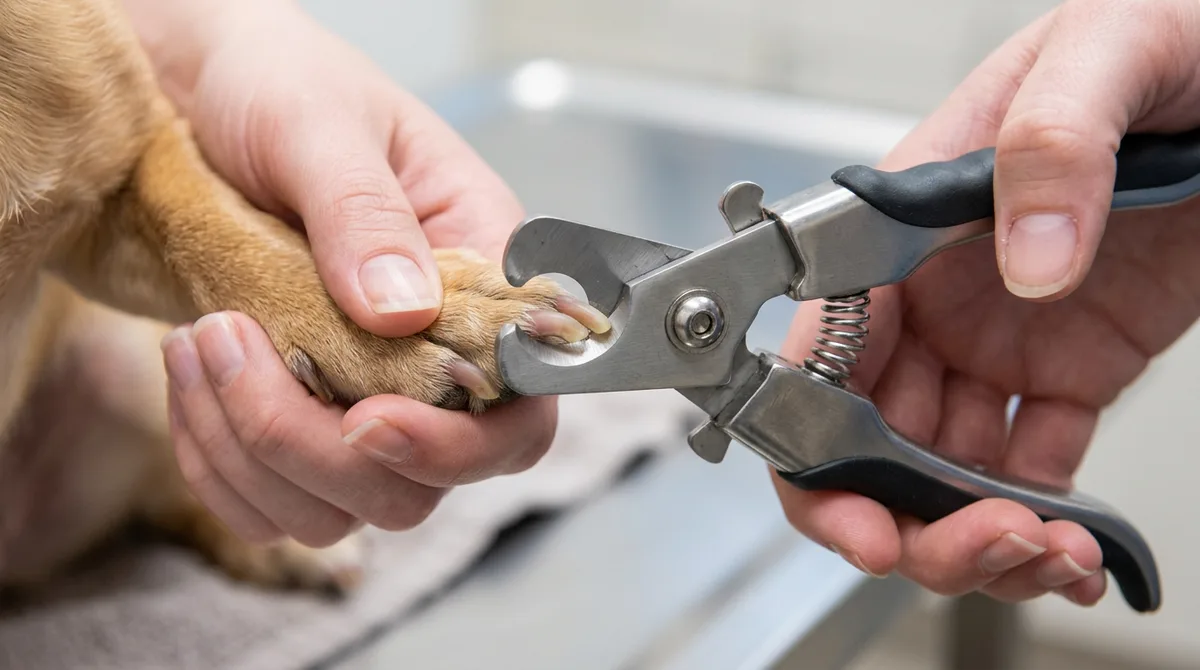
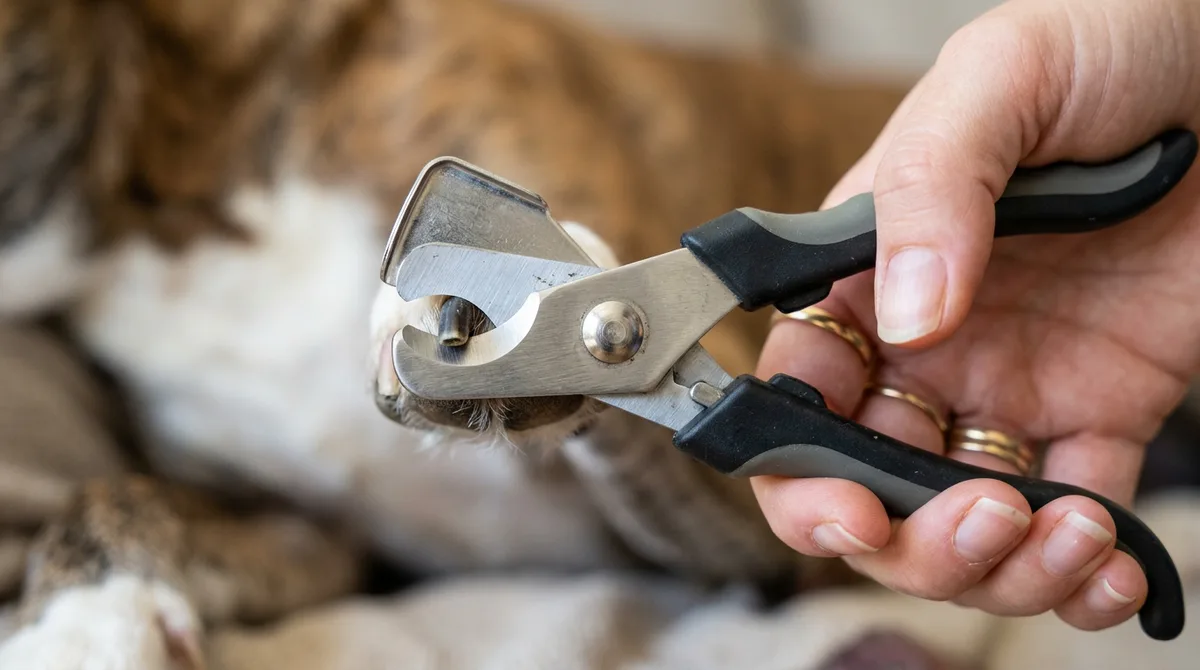
A guillotine clipper has a small ring at the tip. You slide the nail through the ring, and a single blade rises up (or drops down) to shear off the end. Because the ring frames the nail, some people find it easier to judge how much they are removing. Guillotine clippers work best on small and medium dogs with thinner nails; on a very thick nail they can bind or tear rather than slice. One important mechanical detail: the blade should face you, not the dog, so it rises up toward the front of the nail. Loading the nail the wrong way pushes the cut in the wrong direction and can pinch.
- Best for: small and medium dogs, thinner nails
- Strength: the ring frames the nail and limits how much sits in the path
- Watch out for: blades dull faster and struggle on thick nails; orientation matters (blade toward you)
Clippers with a built-in safety guard
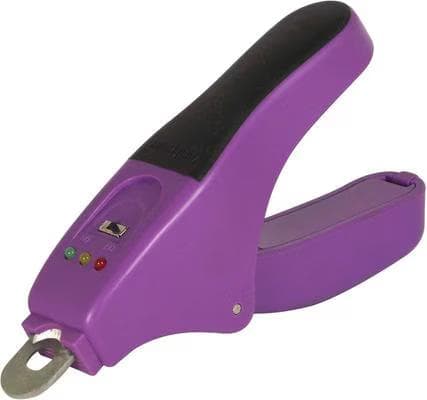
Many scissor-style clippers include a small plastic safety guard, a flip-down stop that blocks the blade from traveling past a set point. The guard cannot see your dog's quick, so it is not a magic "never hurt them" switch, but it does stop you from taking a huge bite in a single nervous squeeze. For a first-timer, that ceiling on depth is genuinely reassuring. Most experienced trimmers eventually flip the guard out of the way for full control, but there is no shame in leaving it in place while you build confidence.
Petful may earn a commission when you click through to Chewy, at no extra cost to you.
- If your dog has thick, dark nails, a strong scissor-style clipper will give you a cleaner cut and better visibility than a guillotine, which makes the whole job safer.
How to hold the clippers and position your dog
Half of using dog nail clippers correctly is body position, both yours and your dog's. A secure, comfortable hold means you are not chasing a moving paw, and a dog who feels stable is a dog who holds still.
Holding the clippers
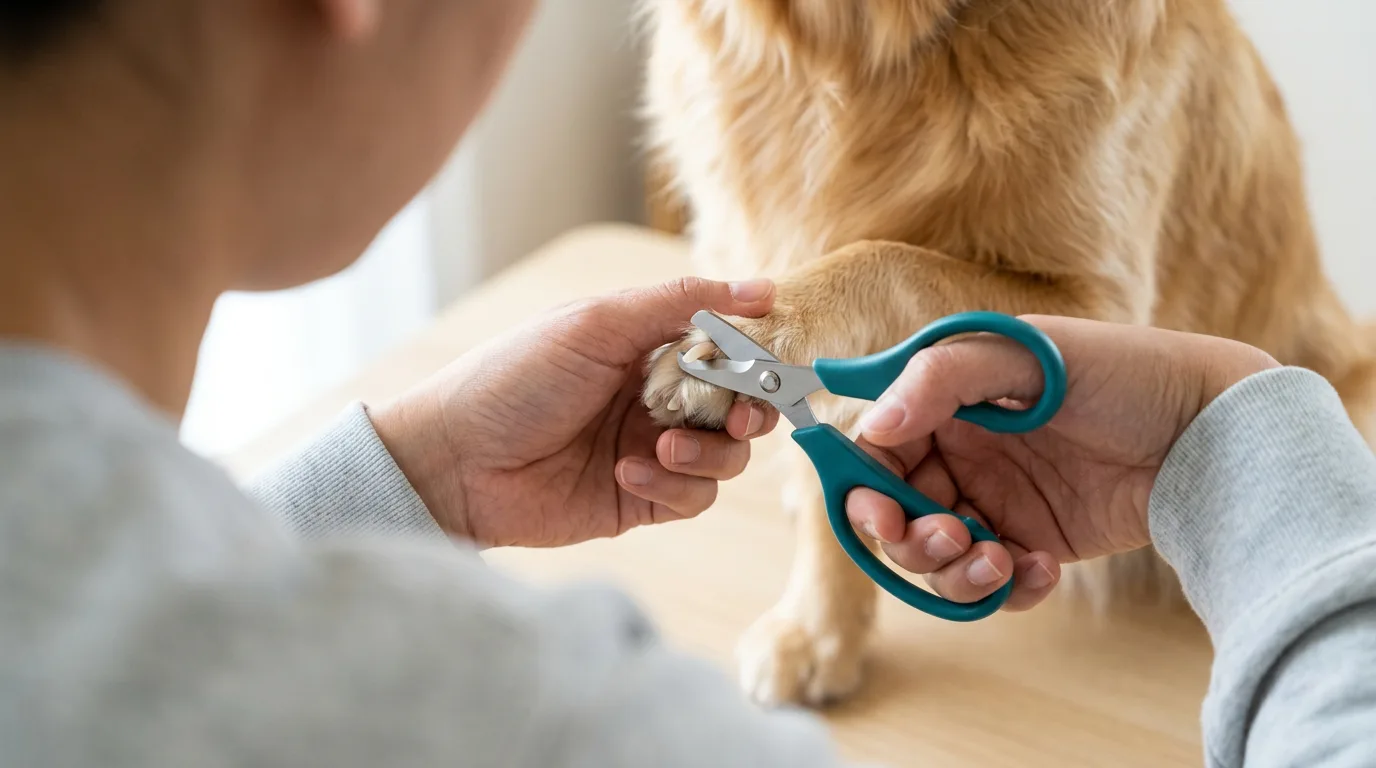
Grip the clippers in your dominant hand the way you would hold scissors or pliers, with a firm, full-hand grip rather than a delicate two-finger pinch. You want control, not force. Orient the blades so you are cutting across the tip of the nail, not down into it from the top. With your other hand, hold the paw and use your thumb and forefinger to gently push the fur back and isolate the single nail you are about to cut. Steady the dog's toe between your thumb and finger so it cannot wiggle at the moment you squeeze.
Positioning your dog
- Small dogs: hold the dog in your lap or have a helper cradle them against their chest. Working from behind or beside the dog (rather than looming over the front) feels less threatening.
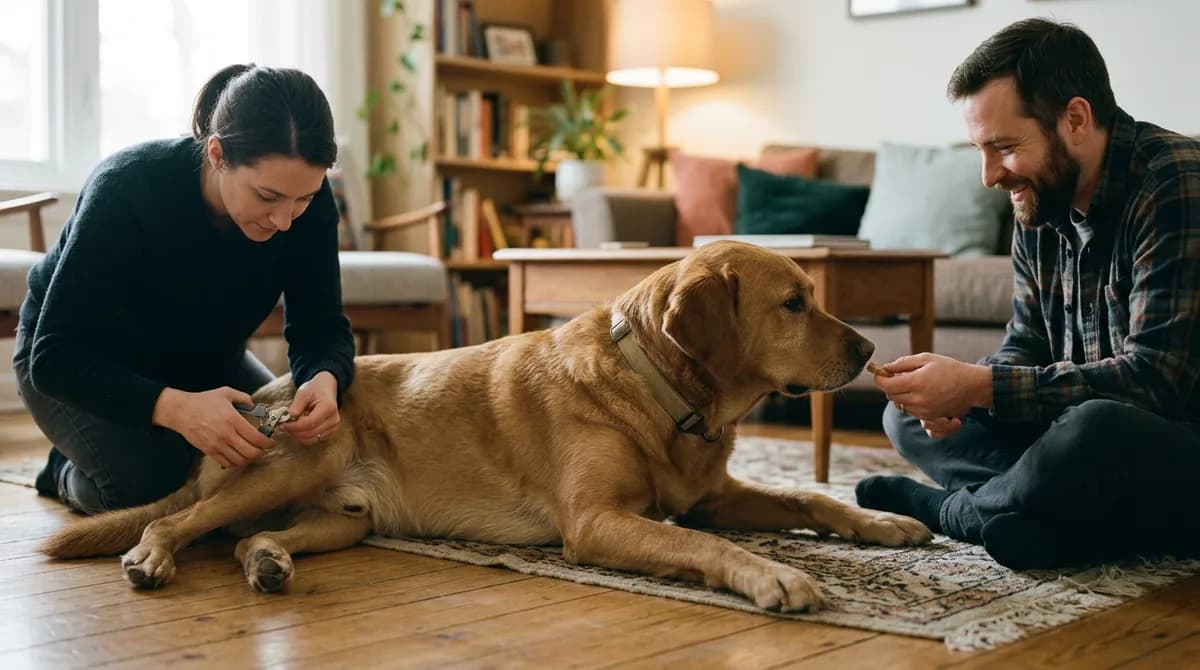
- Medium and large dogs: have the dog lie on its side on the floor or a couch, or sit beside them and lift one paw at a time. Many big dogs are calmest lying down with their back against you.
- Wiggly dogs: a second person offering a lick mat or a smear of peanut butter turns the whole event into a snack break. This is the single biggest difference between a fight and a routine.
Always bring the paw gently backward or to the side in the direction the joint naturally bends. Never twist a leg forward or up into an unnatural angle to get a better view; reposition yourself instead.
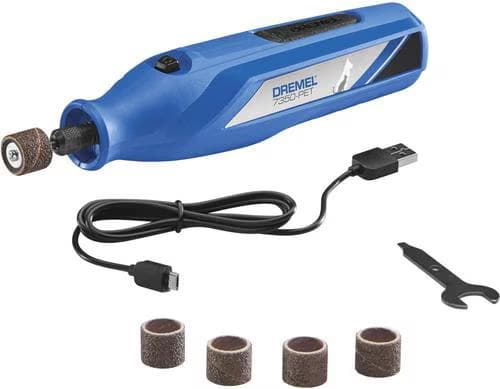
Petful may earn a commission when you click through to Chewy, at no extra cost to you.
- Spend a week just touching paws and pressing the clippers against a nail (without cutting) while feeding treats. A dog who associates the tool with food sits far more calmly when the real cut comes.
The correct cutting angle and how much nail to take off
This is the part that decides whether the cut is comfortable or painful, so it is worth slowing down for.
Hold the clippers so the blade meets the nail at roughly a 45-degree angle, cutting from underneath toward the front, following the natural curve of the nail. Cutting straight down flat across the top of the nail can crush or split it and gets you closer to the quick than you intend. A 45-degree cut removes the hooked tip and leaves a clean, slightly angled end.
How much should you take? The golden rule is less than you think, more often than you think. Remove only the thin, curved tip, roughly 1 to 2 mm per cut. If the nail is very long, do not try to fix it in one heroic snip. Take small slices, checking the cut face after each one, and stop the moment you get close to the quick. Frequent tiny trims also encourage the quick to recede over time, so overgrown nails gradually become easier and safer to keep short.
The quick is the pink, living core inside the nail that carries a blood vessel and a nerve. On light nails you can see it as a pink shadow; aim to stop about 2 mm short of it. On dark nails you use the cut face as your guide instead, which we cover below.
One prep question comes up constantly: is it better to clip wet or dry? For everyday trims, dry wins. A dry nail cuts clean and predictable, while a soft, water-logged nail is more likely to crush or split under the blade. The one exception is a dog with very hard, brittle nails, where a short walk or a quick bath beforehand softens them just enough to cut more easily. If you do bathe first, dry the paws before you clip so the tool does not slip.
| What you see | What it means | What to do |
|---|---|---|
| Solid white/tan all the way across | Still safely in the dead nail | Take another thin slice |
| A small dark dot appears in the center | You are approaching the quick | Stop here, this is the target |
| A gray or pink translucent oval | You are at the quick | Do not cut further, you are done |
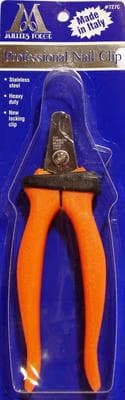
Petful may earn a commission when you click through to Chewy, at no extra cost to you.
Using a guard versus cutting freehand
The safety guard is a beginner's friend and, later, an optional accessory. Here is how to decide.
Cutting with the guard down is the safer choice for your first several sessions, for anyone whose hands shake a little, and for dogs who jerk their paw. Flip the guard into place, slide the nail so only the tip clears the blade, and squeeze. The guard physically prevents the blade from lunging deep on a single cut, so even if your dog flinches at the wrong second, the damage is capped at the tip.
Cutting freehand (guard flipped out of the way) gives you full control over exactly where the blade lands, which matters when you are shaving thin slices off a black nail and need to advance a fraction of a millimeter at a time. Experienced trimmers usually go freehand because they trust their read of the nail. Move to freehand only once cutting the tip feels routine and your dog sits calmly.
There is no rule that says a "real" owner does not use the guard. Plenty of people leave it on for the life of the clipper. It is a tool for consistency, not a crutch.
- Guard caps how deep a single cut can go
- Reassuring for nervous first-timers and jumpy dogs
- Reduces the chance of a deep quick strike on a flinch
- Cannot see or account for your dog's actual quick
- Limits precision when shaving thin slices off black nails
- Can get in the way on very small or very large nails
Black nails: using clippers when you cannot see the quick
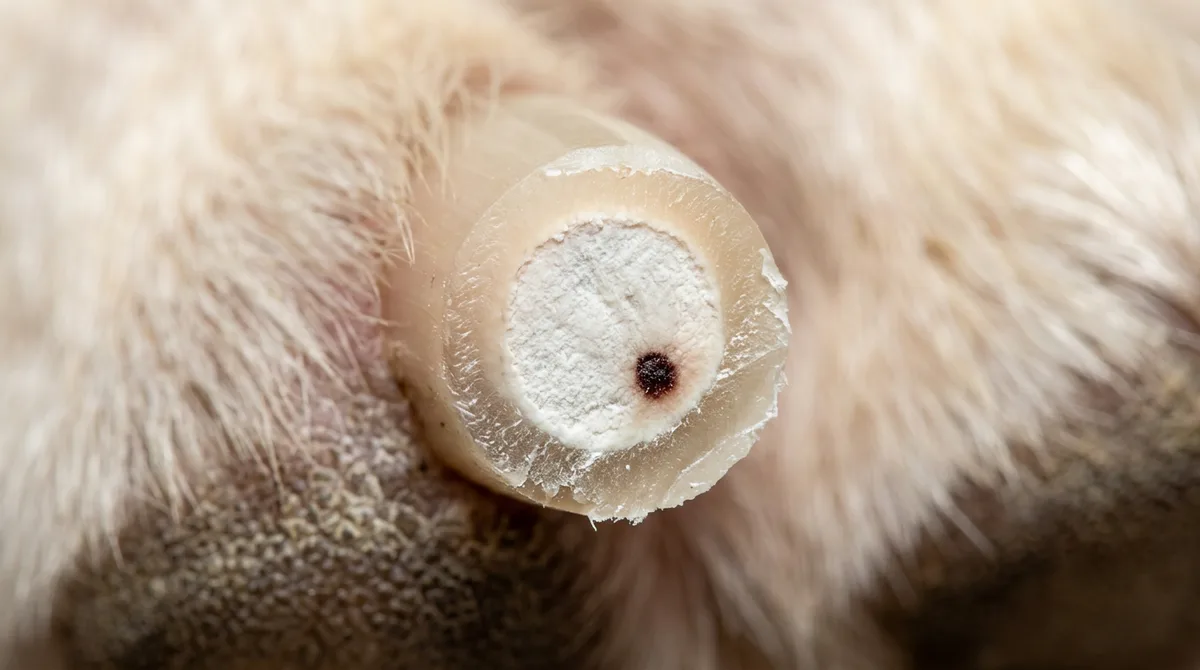
Black or dark nails are the number one reason people freeze, because the pink quick that guides a light-nail cut is completely hidden. You do not need to see the quick. You need to read the cut face instead.
Here is the reliable method:
- Position the clipper to take a very thin slice off the very tip, thinner than you would dare on a light nail.
- Cut, then look at the freshly cut end straight on.
- If the center is chalky, white, or gray and flaky, you are still in dead nail: take one more thin slice.
- Keep shaving thin slices, checking after each one.
- Stop immediately when a small dark dot or a soft, moist, gray-to-pink oval appears in the center of the cut face. That oval is the leading edge of the quick. One more slice would draw blood.
Good lighting is your best friend here. Some clippers include a small LED to illuminate the nail, and a bright lamp or a phone flashlight held by a helper works just as well. When in doubt on a black nail, undercut deliberately: leaving a nail a hair too long is completely harmless, while cutting a hair too short is what teaches a dog to hate the clippers.
- The quick carries a blood vessel and a nerve, so cutting into it bleeds and genuinely hurts. On dark nails you cannot see it, so remove only paper-thin slices and stop the instant a gray or pink oval appears in the center of the cut face. When unsure, leave the nail slightly long rather than risk one cut too deep.
First-timer step-by-step: your first trim, start to finish
Put it all together. Do not aim to cut all 18 nails on day one; even two or three good cuts followed by a treat is a win.
1. Set up before you touch the dog. Clippers, styptic powder (or cornstarch as a backup), high-value treats, and good light, all within arm's reach. If styptic is across the room when you nick a quick, that is a problem.
2. Get your dog settled. Small dog in your lap or a helper's arms; big dog lying on its side. Offer a lick mat to occupy them.
3. Isolate one nail. Hold the paw, push the fur back with thumb and forefinger, steady the toe.
4. Line up the cut. Blade at 45 degrees, aimed to remove only the curved tip. On a light nail, find the pink quick and stay 2 mm short of it. On a dark nail, plan to shave thin slices.
5. Make one small cut. Squeeze firmly and smoothly. Do not saw.
6. Check the cut face. Light nail: stop when a dark dot appears. Dark nail: stop when a gray or pink oval appears. Otherwise, take one more thin slice.
7. Reward instantly. Treat and praise after every nail (or every paw), so the dog learns that clippers predict good things.
8. Know your bail-out. If your dog is escalating from squirming to panic, stop. A few nails today and a few tomorrow beats one traumatic marathon that makes the next trim harder.
9. If you draw blood, do not panic. Press a pinch of styptic powder (or cornstarch) firmly onto the nail tip for 30 seconds to stop the bleeding, then give your dog a break and a treat. A single nicked quick is not an emergency; it is a normal part of learning.
Aim to trim every 3-4 weeks. Nails you can hear clicking on a hard floor are already overdue.
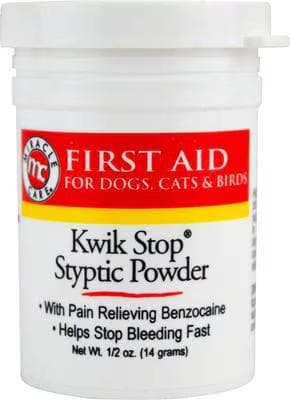
Petful may earn a commission when you click through to Chewy, at no extra cost to you.
- If clippers make you nervous, a rotary nail grinder files the nail down instead of cutting it, which removes the risk of one sudden deep cut. Grinders take longer and some dogs dislike the vibration and sound, but the technique is more forgiving. Introduce the tool while it is off, then on but not touching, before you ever file a nail.
- 1Prep your workspace (clippers, styptic powder, treats, light) before you touch your dog
- 2Cut at 45 degrees, tip only, and check the cut face after every single slice
- 3Light nails: stop at the dark dot. Dark nails: stop at the gray or pink oval
- 4A few calm nails plus a treat beats one stressful marathon
- 5Trim every 3-4 weeks; clicking on the floor means you are overdue
The trick is to cut small and cut often. Remove only the thin curved tip at a 45-degree angle (about 1 to 2 mm at a time) instead of one big cut, and check the cut face after each slice so you stop before the quick. Frequent tiny trims also make the quick recede over time, so nails get easier to keep short.
Beginners should start with a strong scissor-style clipper (keep the safety guard down at first), settle the dog in a lap or lying on its side, isolate one nail by pushing the fur back, and take one small cut off the tip at a 45-degree angle. Reward after every nail and stop after just a few if your dog gets stressed. Keep styptic powder within reach before you begin.
Hold the paw steady, position the blade at a 45-degree angle across the tip, and remove only the curved end. On light nails, stay about 2 mm short of the visible pink quick. On dark nails, shave thin slices and stop when a gray or pink oval appears in the center of the cut face. Trim every 3 to 4 weeks.
The best position depends on size. Hold small dogs in your lap or a helper's arms; have medium and large dogs lie on their side on the floor or couch, working one paw at a time. Bring the paw gently backward in the direction the joint naturally bends, and never twist the leg into an unnatural angle. A helper with a lick mat keeps wiggly dogs still.
Dry is better for clipping. A dry nail gives you a clean, predictable cut, while a wet nail can be softer and more likely to split or crush. That said, a quick bath or walk beforehand can soften very hard, brittle nails slightly and make them easier to cut. If you bathe first, dry the paws before you clip so the tool does not slip.
The least painful approach is small, frequent cuts that never reach the quick, paired with plenty of treats so the dog stays relaxed. Take off only the tip, use good light to read the nail, and keep the safety guard down to prevent an accidental deep cut. If clippers stress your dog, a rotary grinder files the nail gradually and removes the risk of one sudden deep cut.
The proper way is to grip the clippers firmly in your dominant hand, steady the toe with your other hand, and cut across the tip of the nail at a 45-degree angle following its natural curve. Remove only 1 to 2 mm at a time, check the cut face after each cut, and stop before the quick. Reward your dog after each nail and keep styptic powder on hand in case you cut too far.

Coreen Saito is a pet writer and longtime shelter volunteer with more than a decade in animal rescue. She covers cat behavior, breed care, and the small, ordinary science of sharing a life with companion animals, with a particular focus on honest takes about the products and decisions that actually matter. At home in Arizona, she's outranked by Mac (a dog with the loudest opinion in the house), Rebel (a cat who governs by quiet authority), and Meri (an orange tabby who runs the late shift and the laundry basket). She writes about all three, plus the rescues that keep coming through her life, at LifeWithMinty.com.
Sign up for expert-backed reviews and safety alerts all in one place.